Social Icons

Tuesday, September 8, 2015

How To Turn Your Windows 8.1 Or Windows 10 Device Into A WiFi Access Point

If you used Windows 7 or Windows XP, you know that these operating systems allow you to create ad hoc wireless connections between computers. You could use those connections to create a wireless network between multiple computers or to share the Internet connection that was available on one of them. If you use Windows 8.1 or if you just migrated to Windows 10, then you might have noticed that this can no longer be done, at least not using a visual interface. However, with the help of the Command Prompt and a few commands, you too can turn your Windows 8.1 or Windows 10 laptop or hybrid device into a WiFi access point. Here's how:

What You Need In Order For This To Work

To use your Windows 8.1 or Windows 10 laptop or hybrid device as an WiFi access point for other devices, it must have at least 2 network cards installed and one of them must be a wireless network card. One of them must be connected to the Internet.
We've tested multiple scenarios, and the ones that worked great include:
  • One laptop using its Ethernet connection for Internet access and its WiFi adapter to broadcast - use a network cable to connect your laptop to the Internet and the wireless network card for the access point that's sharing the Internet access with other devices.
  • One laptop that is connected to the Internet through a mobile USB modem and broadcasts the wireless network through its WiFi adapter - many users will have a USB mobile modem available with 3G or 4G connectivity. They can use it for Internet access and use the wireless network adapter for creating the access point and sharing the Internet access with others.
  • One laptop and two wireless network adapters, one connected to the Internet and the other acting as an access point - you won't find this situation too often, as laptops and hybrid devices don't come with two wireless network cards installed. However, you can install a wireless USB adapter and use it to create the access point.

Step 1. Create A Virtual WiFi Network

To begin, we'll need to open Command Prompt with administrative privileges and use a command to create a virtual wireless network that is broadcasted by your device.
connect, wireless, network, access point, command prompt, Windows 8.1, Windows 10
To show you how this is done, we will create a wireless network called Hotspot. The password for this network will be "7Tutorials".
Inside the Command Prompt window, type the following command:

netsh wlan set hostednetwork mode=allow ssid=Hotspot key=7Tutorials

Notice that the name of the network is set using the SSID parameter and the password is set using the KEY parameter. Obviously, you can set your own values for them.
To create the access point, press Enter. If all goes well, you should see that the hosted network has been set.
connect, wireless, network, access point, command prompt, Windows 8.1, Windows 10
Now you have created a virtual adapter that can function as a wireless access point for other computers and devices in your area. However, in order for it to work, you need to take one more step: turn this virtual adapter on.
Do not close the Command Prompt. Keep it open and enter the following command:
netsh wlan start hostednetwork
connect, wireless, network, access point, command prompt, Windows 8.1, Windows 10
Then, press Enter.
The virtual wireless adapter is now started and shown in the Network and Sharing Center.
connect, wireless, network, access point, command prompt, Windows 8.1, Windows 10
You can connect all your devices to the newly created wireless network. However, it has no Internet access. If you stop at this point, when you connect other devices and computers to the newly created access point, you can create a network between them and use it to share files and resources, but they won't have any Internet access.

Step 2. Allow Internet Access For The Devices That Are Connected To The Virtual WiFi Network

Open the Network and Sharing Center. Notice that the virtual network adapter you just created is displayed as active, but it has no Internet access at this time.
connect, wireless, network, access point, command prompt, Windows 8.1, Windows 10
Click or tap the connection of the physical network adapter that currently has Internet access. In our case, it is an Ethernet connection.
connect, wireless, network, access point, command prompt, Windows 8.1, Windows 10
This opens the Status window for the selected network adapter. Click or tap Properties.
connect, wireless, network, access point, command prompt, Windows 8.1, Windows 10
In the Properties window, go to the Sharing tab.
connect, wireless, network, access point, command prompt, Windows 8.1, Windows 10
In order to give others Internet access to the virtual WiFi adapter that we created earlier, check the box near "Allow other network users to connect through this computer's Internet connection".
connect, wireless, network, access point, command prompt, Windows 8.1, Windows 10
Then, select the virtual adapter that was created earlier.
connect, wireless, network, access point, command prompt, Windows 8.1, Windows 10
Click or tap OK and Close to save the settings you've made.
Go back to the Network and Sharing Center and you will notice that the virtual network adapter now has Internet access.
connect, wireless, network, access point, command prompt, Windows 8.1, Windows 10
The virtual adapter now gives Internet access to all the devices that are connected to it.
Step 3. Connect Your Wireless Devices To The Access Point

The next step is to connect your wireless devices to the virtual WiFi access point and use them to access the Internet. Also, the devices that are connected to your laptop or hybrid PC, are placed in the same network with the access point. You can use that network to share files and folders between devices.

Tuesday, August 18, 2015

How to Force Download Windows 10 Free Update?

A lot of computer users are anxiously waiting for Windows 10 to get downloaded on their system so they may get their hands on the newest operating system from Microsoft.
There is a slight chance that you might have received the update but it appears that majority of users are still waiting since Microsoft is upgrading users in phases.
We know that you can’t wait forever to get your copy of Windows upgraded to Windows 10; so here’s a way of downloading the Windows 10 upgrade by force.
Just in case you don’t know, Microsoft is offering Windows 10 Upgrade for free for limited time. So its better to avail the opportunity and experience smooth Windows 10 OS.
Follow below steps to get your Windows 10 upgrade straight away:

Method 1

Step 1:  
Go to your C drive to see if it has a folder called “$Windows.~BT”. You will have to check hidden files and folders as well.
If you can see the folder in your C drive, then you are all set; otherwise you will have to follow below steps to force download your Windows 10 upgrade.
Pre-requisites:
  • You are supposed to have genuine copy of either Windows 7 SP1 or Windows 8.1 Update.
  • Your computer must have all the previous updates installed from Windows Update.
  • Make sure your computer meets all Windows 10 requirements, such as:
    • RAM: 1GB for 32-bit / 2GB for 64-bit
    • Storage: 16GB for 32-bit / 20GB for 64-bit
    • CPU: 1GHz or faster
    • Graphics: DirectX 9 capable video card
Step 2:
AGetStartedApp_Image_391x227Make sure you have reserved your free copy of Windows 10 upgrade. If you haven’t then to reserve your free upgrade, you have to use the Windows 10 app.
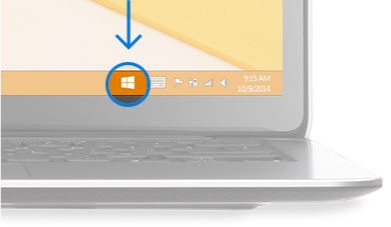
Simply click on the small Windows icon in the taskbar, click ‘Reserve your free upgrade’ and enter your email address to receive a confirmation.
Also make sure that this wizard checks your computer for compatibility. We are hearing that few users are struggling with display drivers during the upgrade process.
Step 3: Run Windows Update, and make sure you are set to receive updates automatically.
Step 4: Navigate to C:\Windows\SoftwareDistribution\Download folder and delete everything in this folder. Don’t worry, Deleting files from this folder is safe.
Step 5: Go to start menu, right click on it and click “Run as Administrator” and type “cmd”. You can also open command prompt from search in Windows 8. Type CMD in Windows 8 Search, right click on it and then “run as administrator”
Step 6: Type this command and press enter: wuauclt.exe /updatenow.
And that’s it. Check windows update panel to see the status of download. Let it get completed before the installation starts.

Method 2:

Good luck.

Monday, August 17, 2015

Microsoft can disable your pirated games and illegal hardware

Updated EULA terms let Microsoft invade your Windows 10 computer in search of counterfeit software

Microsoft’s updated End User Licence Agreement terms and conditions let it disable any counterfeit software or hardware and, if you’re running a Windows 10 computer, you’ve just agreed to them.
Section 7b – or “Updates to the Services or Software, and Changes to These Terms” – of Microsoft’s Services EULA stipulates that it “may automatically check your version of the software and download software update or configuration changes, including those that prevent you from accessing the Services, playing counterfeit games, or using unauthorised hardware peripheral devices.”
This means that, if you use Windows 10, a Windows phone, or any of Microsoft’s other services, Redmond can disable any games you’ve pirated or devices you’ve unlawfully hacked.
While it’s incredibly clear what Microsoft means by “counterfeit games”, the wording “unauthorised hardware peripheral devices” is a little hazy. Does this mean Microsoft can now block uncertified PC or illegally-modified Xbox One and Xbox 360 controllers? Furthermore, Microsoft’s EULA doesn’t state if it will also disable other counterfeit software, such as cracked versions of Office or Adobe Photoshop, or if it only cares about pirated games.
I’ve reached out to Microsoft for a comment about these unanswered questions and will update you when more information becomes available.
Video game piracy, or “counterfeit games” as Microsoft puts it, has been a big issue in PC gaming for a long time. Many developers have sought to circumvent it by hard-coding impossible odds into their games, which are only solved by having a purchased activation code on your computer. The same issue is also now becoming prevalent on Android and jailbroken iOS devices. However, under Microsoft’s new EULA, Windows 10 Mobile would be able to combat any pirated software a user loads onto their phone – potentially making it an attractive prospect for indie developers scared of having their work stolen.
Interestingly, Microsoft killed off its incredibly unpopular, DRM-heavy, Windows Live Games in Windows 10, and opted to support Steam instead. But, with these new terms and conditions, Microsoft has practically baked DRM into the core of Windows 10.

Tuesday, April 14, 2015

All of Wikipedia can be installed to your desktop in just 30 hours


Open source application simplifies process of hosting offline Wikipedia.


An open source application automates the process of downloading and displaying all of Wikipedia on your desktop, a large task that takes more than a day to complete.
Dubbed Xowa, the software displays an offline copy of 4.4 million Wikipedia articles with full HTML formatting intact. You can even set up additional wikis, like Wiktionary or Wikquote, and navigate between them while offline. For example, you could "Click on 'Look up this word in Wiktionary' and instantly view the page in Wiktionary."
Xowa has been around for a while with support for "Simple Wikipedia," which has just a fraction of the full collaborative dictionary. It was updated yesterday with support for the entire English language-version of Wikipedia.
The SourceForge project page describes:
English Wikipedia has a lot of data. There are 13.9+ million pages with 20.0+ GB of text, as well as 3.7+ million thumbnails.
Setting all this up on your computer will not be a quick process... The import itself will require 80GB of disk space and five hours processing time for the text version. If you want images as well, the numbers increase to 100GB of disk space and 30 hours of processing time. However, when you are done, you will have a complete, recent copy of English Wikipedia with images that can fit on a 128GB SD card.
Although at least 80GB of disk space is used during setup, the wiki files end up being reduced to 25GB after the deletion of a 45GB temporary file and other cleanup.
Besides wiki data dumps and images from the Wikimedia Foundation, Xowa primarily consists of XUL Runner, a Firefox runtime environment; Java; and SWT, the Standard Widget Toolkit for Java.
If you want a download and setup that won't take an entire day, the Xowa developers recommend starting with Simple Wikipedia. "Simple Wikipedia has 184,000 pages and 90,000 images," Xowa writes. "The text version uses 200MB and sets up in five minutes. With images, this expands to 2GB and 30 minutes of downloading time. Simple Wikipedia is a reasonably accurate simulation of English Wikipedia—just much smaller."
Your Xowa-powered offline wiki, simple or not, can run on Windows, Linux, or OS X and can be updated any time from Wikimedia's database backups.

Wednesday, February 18, 2015

Monday, January 26, 2015

 
UA-4607569-3